Sunday, October 10, 2010

Bow Tie Pasta with Basil Pesto, Marscapone, and Grilled Chicken

We had family in town the last week of August, right when the basil in the garden had reached MONSTROUS heights.  I really should have taken a picture of it...but didn't...sorry about that.  You will have to use your imagination.  This one basil plant had branched out into a bush about 12 feet long, 4 feet high, and about 5 feet deep.  It covered at least 1/3 of our entire garden bed.  Land sakes alive people!

I decided to enlist the help of my SIL and she helped me pick 2 huge bowls of basil (she later told David she'd never seen basil grown so big before).   I've always loved pesto, and having so much basil in the back yard called for major pesto production.   

Basil pesto can be used in so many cooking applications.  Besides being tossed with hot, freshly cooked pasta, try a dollop in a bowl of soup.  Add it to mayo for a great sandwich spread, use it on baguette slices for bruschetta...you can even mix it into mashed potatoes.  Yum!

I do think using a good quality cheese, like Pecorino Romano or Parmigiano-Reggiano results in a better tasting pesto than using the regular grated Parmesan you get in the canisters at the grocery store.  I know it's more expensive, but you only need 3 tablespoons of cheese per batch of pesto...so a little goes a long way.  I also don't add salt or pepper to my pesto--the cheese adds enough of a salty punch, and the spicy basil can hold it's own without any additional pepper. 

One more thing...a good food processor is a must for making pesto.  I used my big one because I nearly always make multiple batches...but a mini food processor will work if you're making a single recipe. 

Bow Tie Pasta with Basil Pesto, Marscapone, and Grilled Chicken

FOR THE PESTO (Makes about 1/3 cup):
2 cups firmly packed fresh basil leaves
3 tablespoons pine nuts, sliced almonds or walnut pieces
2 medium cloves of garlic, peeled
3 tablespoons grated cheese (pecorino romano or parmigiano-reggiano is preferred)
1/3 cup olive oil

FOR THE REST OF THE DISH:
4 chicken breasts, grilled to your liking
1/3 to 1/2 cup marscapone cheese (found next to the regular cream cheese in your grocery store)
1 pound bow tie pasta, cooked al dente, reserving 1 cup of the pasta water for the sauce
Additional grated cheese (paremsano, romano, etc.) for garnish if desired

Bring a large pot or deep skillet of water to a boil.  You don't need to fill up the whole thing...just enough to submerge the basil.  Have a large bowl of ice water ready nearby.  Now...I'll bet you're thinking, why are we blanching the basil?  (Try saying that 3x fast. ;-)

I've learned if you blanch the basil first, it will help the leaves retain their bright green color.  I would always freeze my leftover pesto, and was disappointed when it would turn a muddy greenish-black after it thawed.  So I did some research...and now I blanch the basil first.  It's a quick, easy step...you'll be glad you did.  Plus...any tiny bugs that didn't get washed off will be boiled out of existence. 

I was making multiple batches, so you'll see there are more ingredients in the pictures below. 

 Once your water is boiling, drop in your basil and gently push the leaves under the surface.  Turn off the heat, and just let the basil hang out for 30 seconds to 1 minute.  All you have to do is essentially wilt it...which takes no time at all.

 Use a large slottted spoon or spider strainer to remove the basil to the bowl of ice water.  We want to shock the basil so it stops cooking. 

After about 5 minutes, drain the basil and gently squeeze it dry.  You don't have to get every last bit of water out, but it shouldn't be drippy at all. 

Now, in your food processor fitted with the chopping blade, combine the basil, nuts, garlic, and cheese. 

Process until everything is in very small bits, about the size of fresh bread crumbs. 

With the machine running, slowly pour in the olive oil through the feeder until you have a thick paste.  Some people like their pesto a bit looser...so add more olive oil if you'd like.  I like it thicker, and often use only half to 2/3 of the olive oil. 

At this point, you can use the pesto right away, or freeze in small containers for future use.  Thaw at room temperature before using. 

Isn't that PURTY???

The simplest way to use pesto (in my opinion) is to serve it with pasta.  I boiled up the bow ties, and immediately tossed it with about 1/3 to 1/2 cup of pesto, the pasta water, and the marscapone cheese.  Make sure you do this when the pasta is HOT...this helps distribute all the yummy goodness of pesto and cheese and pasta water together to make the sauce. 

Slice up the grilled chicken, and serve with the pasta.  Grate some more cheese on top if you'd like. 

My SIL and BIL loved this dish...and so did my nephew Ben.  I think he had seconds in fact! ;-)

I know some of you have already had fall blow in, but we're still in the low to mid 80's here in south Texas.  So go beg, borrow, or steal some basil and make some pesto to enjoy now and in the winter when you're wanting something fresh and green that reminds you of summer's bounty. 

God bless your table tonight!

Wednesday, September 29, 2010

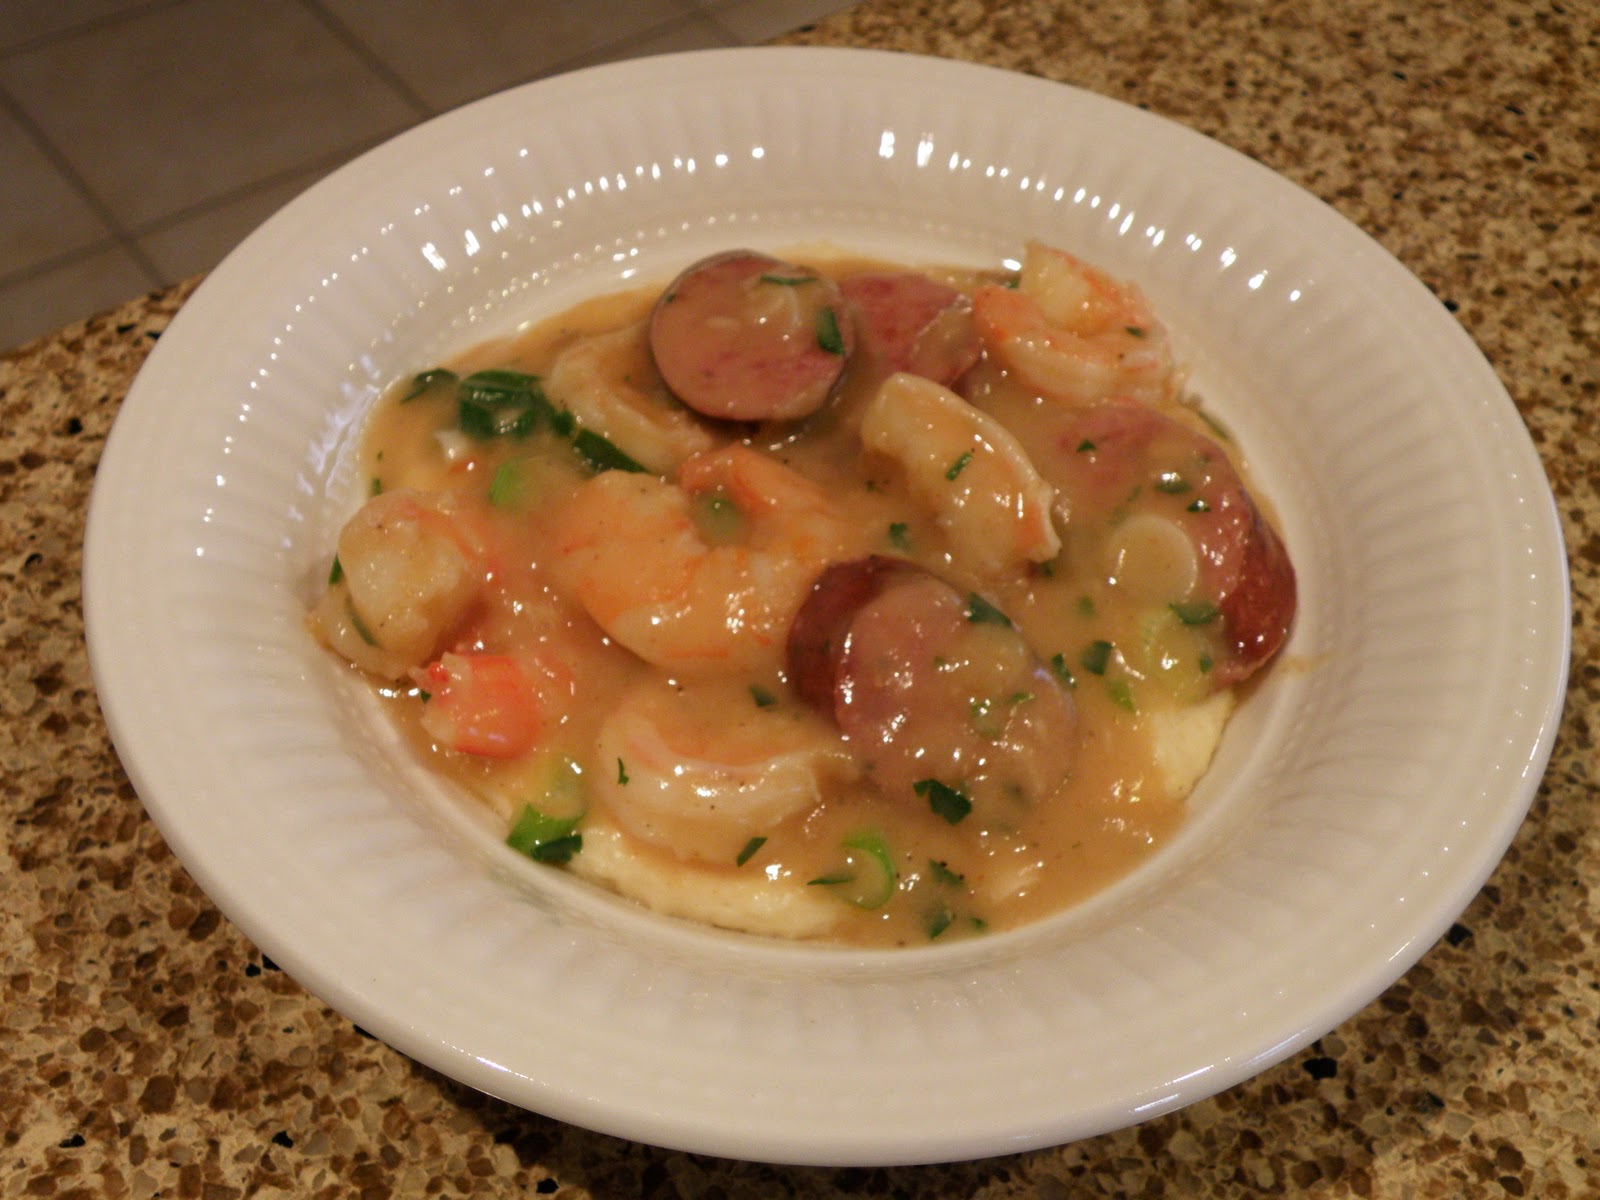
Shrimp over Creamy, Cheesy Grits

This recipe came about when I became determined to try and get more people in our house to like grits.  I'd had minor success with polenta, but I really wanted to cook grits on a more regular basis.  Most of you have this problem...you enjoy certain foods, but rarely cook them because nobody eats them except you. 

Now David will eat just about anything if I put a LOT of cheese in it.  But that adds fat and calories.  After some research...I decided to try making the grits with evoporated milk instead of water.  I still put some cheese in, but not as much as I might have, hoping the evaporated milk would give it a nice, creamy texture and great flavor.   

In addition to having an adversion to grits, only David, Rebecca, and I eat shrimp.  So I added some sausage to the recipe...now everyone else would have a protein to eat. 

Want to see if this will pass the test at your house?  Here's the recipe...it's easy, and you'd better bookmark it for Lent next spring, minus the sausage, of course. ;-)

Shrimp over Creamy, Cheesy Grits

1 cup quick cooking grits
3 cups evaporated milk
2 tablespoons unsalted butter
1 cup mild cheddar cheese
Dash of salt
1/4 teaspoon pepper

1 pound link sausage, cut into 1/2 inch pieces
1 medium onion, diced
1 tablespoon butter
2 tablespoons all purpose flour
1 teaspoon Old Bay seasoning
2 bay leaves
1 can (15 ounces) low sodium chicken broth
1 pound large shrimp, peeled and deveined
3 green onions, chopped
2 tablespoons freshly chopped parsley

We'll start with the grits...they'll stay plenty hot while you make the shrimp.  Bring the 3 cups of evaporated milk to a gentle boil and pour in the grits. 

 Stir in the salt, pepper, and continue to cook for 5-10 minutes...however long the box tells you too.  When all the milk has been absorbed, the grits are done. 

Remove from the heat and add the butter and cheese (I know...the salt and pepper were in this pic instead of the previous one).  Stir once more to incorporate all the cheese.  Put the lid on and set aside.

Heat the one tablespoons of butter in a large skillet over medium heat.  When hot, add the onion and saute until soft.  Toss in the sausage and let it brown for 5 minutes on both sides.  It's already fully cooked, so we're just going for a little little more flavor by searing it. 

Sprinkle in the flour, and stir well so your sauce won't develop any lumps.  Pour in the chicken broth and keep stirring, scraping the bottom of the pan to get up any brown bits.

Now you can add the Old Bay, bay leaf, and shrimp. 

Continue to cook for about 5-6 minutes.  When the shrimp are pink and opaque, they're done. 

Keep in mind any seafood will continue to cook on the plate, so if you undercook them just a hair, by the time you serve it, it will be finished (overcooked shrimp have a rubbery texture...which is not very appetizing!). 

Turn off the heat, and stir in the green onions and parsley.

Ladle some grits in a bowl, and top with a nice serving of the shrimp and sausage mixture. 

YUM!  Wasn't that easy?  I know Paula Deen woud have used 2x as much butter, lol. 
I held my breath while David took his first bite. 

ME:  "Well, do you like it sweetheart?"

DAVID:  "You know what, the grits work.  It's good."

ME:  "So if I made it again, would you eat it?"

DAVID:  "Yes, I would.  I like it."

At that point, I wanted to jump up on the table and do a little dance but I restrained myself.  We do try and teach our kids proper table manners after all. ;-)

Rebecca said the grits were "okay."  She did like the rest though.  David had his bowl, and a second helping.  In my book, if half of our family eats it, I'll make it again. 

So...there you are, a classic dish with a little twist.  Hope you enjoy making it. 

God bless your table tonight!

Friday, September 17, 2010

Grilled Zucchini Pizza with Roasted Red Peppers and Goat Cheese

Hi everyone!  Here's yet another recipe that involves the grill.  I cannot say enough about grilling or roasting veggies.  They just taste so much better; all the natural sugars caramelize, and you get a hint of smokey flavor, which my hubby loves.  I used to steam all our fresh vegetables until I started roasting our from-the-garden green beans, and wow...they were such a hit.  I haven't used our vegetable steamer in probably 2 years.  It's sitting in my closet, waiting for it's chance to be donated to Goodwill. 

Anyone want it?  Just kidding. 

So, if you are not into zucchini, substitute yellow squash, bell peppers, whatever you fancy.  Goat cheese not your thing?  Toss on some mozzarella or fontina...I'll never know.  As you'll see, this recipe is figure-friendly, thanks to a light hand on the cheese, and a homemade, whole wheat crust.  And of course, you can make plain cheese pizza for all the picky eaters in your house (I don't have any of those you know ;-).

Grilled Zucchini Pizza with Roasted Red Peppers and Goat Cheese

1 recipe homemade whole wheat pizza dough or store bought dough
2 small or one medium zucchini, cut in half, and sliced lengthwise into 1/4 inch slices
Zest and juice from one lemon
1 teaspoon lemon dill seasoning blend
salt and black pepper
Olive oil for drizzling
1/2 cup prepared pizza sauce
1 roasted red pepper, thinly sliced
3 ounces fresh, crumbled goat cheese
1 teaspoon dried basil or oregano

Heat your outdoor grill or indoor grill pan over medium heat.  I used my indoor grill pan, and wanted to make sure the zucchini didn't stick, so I threw everything into a bag--the zucchini, lemon juice and zest, the lemon-dill seasoning and the olive oil.  Give it all a good shake to distribute the olive oil and seasonings. 

Grill for 3-5 minutes on both sides until the zucchini is lightly marked and tender,but not falling apart.  Set aside.

Preheat your oven to 400 degrees.

Divide your pizza dough into 8 equal pieces.  (I decided to make slightly larger pizzas this time, and made 6 individual pizzas instead of 8.  At this point, if you don't need all the dough, you may freeze some for later or use it right away). 

I started off making 4 cheese pizzas for the kids.  Anytime we have pizza in our house, it's inhaled!  Just stretch the dough out, spread with pizza sauce, cheese, and a sprinkling of dried basil or oregano.  Pretty easy, right?  Bake at 400 degrees for 12-14 minutes or until the crust is golden brown. 

Now let's make the pizzas for the grown-up taste buds.  Take 2 portions of dough and gently spread it out into a round shape, about 8 inches across.  Placed on a lightly greased baking sheet (or use a silpat mat if you have one).  

 Drizzle with a tiny bit of olive oil and spread on some of the pizza sauce.  Lay on about 6 slices of the zucchini--you might have to trim them a bit so they'll fit on the dough.   Next up...the roasted red pepper.  I cheated and bought a jar of roasted red peppers. ;-).  But sometimes a jar is cheaper than buying them fresh.  6-8 slices of pepper ought to do it. 

 
Place little crumbles of goat cheese, all around...don't go too crazy with it...

And sprinkle with the dried basil.  I used Penzey's Pasta Sprinkle...I just love this stuff.  But I know not everyone has it, or can get it.  Dried basil is a fine substitute. ;-)

This just begged for a close-up.  Divine veggie goodness...I can't wait to eat you up!

Now your little pizza is ready for the oven.  Bake at 400 degrees for 12-14 minutes, rotating once halfway through the baking time.  The crust should be a light golden brown, and the goat cheese will be very soft. 

It's that pretty?  A perfect way to eat your veggies and have your pizza too! 

Let stand for about 5 minutes, cut into 4 slices, and serve.

I didn't get a pic of the finished cheese pizzas, sorry.  David and I were too busy devoring our dinner, and the kids of course were busy eating too.  I didn't want to snatch their plate away to try and get a picture!

Hope you are able to get out there and grill a little more.  It's still so hot here...we'll surely be able to cook outside for a few more weeks (many a couple of months!). 

God bless your table tonight!

Tuesday, September 7, 2010

I'm Back...Grilled Pork Chops with Lemon-Shallot Chutney

Hi everyone!  I'm thrilled to be back posting recipes. ;-)  I've finally gotten over the last bit of nausea, I can go to the store without gagging, and cook almost anything (although chicken still makes me a bit squeamish). 

Anyway...

I had 3 posts in the the works before I got preggo, and made some awesome pasta with homemade pesto a week ago, so I'm hoping to get these up for you in the next week or two. 

First up, a really easy pork chop to celebrate the last bit of the grillin' season.  Here in south Texas, we can grill nearly all year round, but if you can't, don't worry.  The broiler or indoor grill pan will work just fine.  I saw this on Big Daddy's House Aaron McCargo, and knew this would be a great, quick meal for our busy family.  I also doubled this recipe, since 4 pork chops isn't quite enough for us.  Our camera card went corrupt on us, so I don't have step-by-step photos, but this recipe is fool-proof, so don't sweat it. ;-)

Grilled Pork Chops with Lemon-Shallot Chutney
(adapted from Aaron McCargo and Big Daddy's House)

4 large lemons, supremed *
2 shallots, thinly sliced
2 tablespoons fresh chopped tarragon (or rosemary)
2 tablespoons fresh chopped chives (or scallions)
3 tablespoons olive oil
Pinch of sugar (or more if your lemons are particularly tart)
Salt and black pepper to taste

4 (or more) bone-in pork chops, about 1/2 to 1' inch thick
Salt and black pepper to taste
Smoked paprika to taste (about 2 teaspoons or so)
Olive oil

Make the chutney first and let it hang out in the fridge for a while to marry the flavors. (*To supreme a lemon means to take off all the peel and white pith, and then cut away each lemon segment, much like you see a mandarin orange out of the can). 

Combine the lemon, shallots, tarragon/rosemary, chives/scallions, olive oil, and sugar in a medium bowl.  Season to taste with salt and pepper, and place in the fridge until the pork chops are ready.

Preheat your outdoor grill over medium-high heat and be sure to grease your grates well with a wad of paper towels dipped in vegetable oil.  If you are using an indoor grill pan or broiler pan, some non-stick cooking spray is fine.

Let the pork come to room temperature before you toss it on the grill, then the meat won't seize up on you...it will grill up nice and tender too.  

Trim away any excess fat, and season the chops on both sides with the salt, pepper, and smoked paprika.  Drizzle with some olive oil, and grill for about 4-5 minutes per side.  If you went with thicker pork chops, they will need a couple more minutes per side.  Just be sure not to overcook 'em.  People commonly make the mistake of overcooking pork...it should register about 155 (or just a few degrees more) on an instant meat thermometer, and the inside should be the barest shade of pink. 

Transfer the pork to a serving platter and serve immediately with the lemon-shallot chutney.
 
David and I loved the combination of smoky pork with the bright, lemony flavor of the chutney.  Rebecca loved it too...although she couldn't eat as much as the adults did.  The rest of the kids were indifferent to the chutney, but that meant more for us. ;-). 

I also had my hubby grill some roma tomatoes straight out of the garden to eat along with our meat.  Just cut 'em in half, toss with some olive oil, fresh chopped basil, salt, and pepper, and place on the grill, turning once until they are lightly grilled and soft, but not falling apart, about 5-6 minutes.  Easy and so good!

I hope you get a chance to fire up the grill a few more times and give this recipe a try!

God bless your table tonight!

Friday, August 6, 2010

Leave of Absence

I guess it's time I explained to everyone why I haven't posted in so long. 

We are having a baby.  Yep, one of those cute, sweet things that keep you up all night long, that smell like heaven and poop at the same time. 

And in case you have lost count, this will be #5 for our family.  It's going to be a tiebreaker!

The hardest part of pregnancy for me is weeks 4-10.  I can barely eat, let alone cook.  Just trying to walk into the panty to make the kids lunch makes me gag.  I know I'm supposed to eat protein to try and ward off morning sickness.

And by the way, WHY do they call it morning sickness?  I am sick morning, noon, and night.  24-7 people.  Ugh...I will spare you any more details. 

Anyway, protein is the worst for me.  I cannot stand the sight, smell, taste of any kind of meat.  I try, but I gag...a lot.  Sigh...so it's been granola bars, jello, fruit, toast, and other vain attempts to keep the nausea at bay.  Oh, and TUMS.  Lots of TUMS.  I'm eating 'em like candy y'all. 

I am finally starting to feel better today.  This is the first day I have been able to eat every meal without feeling sick afterwards, and stay up for just a few minutes.  Usually, I am in bed 30 seconds after the kids. 

So, there you have it.  I had 2 posts in the works...and I was hoping to get them up back in July.  We're on vacation right now, and I will try to post them when we get back in town.  I can't promise, but I really miss being in the kitchen, making meals for my crew, and sharing them with you. 

Hope everyone is surviving the heat wave we all seem to be experiencing right now.  See you back in the kitchen soon, and God bless your table tonight!

Monday, June 28, 2010

Light Peach Cobbler

I meant to try and post this last week, but I got a bit burned out last week at VBS.  I was working in the kitchen, preparing snacks for over 400 kids and volunteers every day.  So...I was tired and ready to just take a nap when we got home. 

I made this cobbler the week after we went berry picking, a few days after we made homemade freezer jam, and blackberry trifle.  This is also a light dessert...you could have 2 servings and only feel a little guilty.  The original recipe called for margarine (yuck!), so I used butter instead.  It's only 4 tablespoons though for the whole dish...I can't believe that would hurt anyone too much. 

This cobbler is best serving warm from the oven, but we ate it straight out of the fridge the next 2 nights.  Didn't bother us a bit.  And with whipping topping or vanilla frozen yogurt, it's divine. :-)

Light Peach Cobbler

2 pounds peaches (about 12 small Texas peaches), blanched, peeled, and cut into 1/2" slices
1/3 cup sugar, plus additional sugar to sprinkle on top
2 tablespoons cornstarch
Juice and zest from one large or 2 medium lemons
1 teaspoon cinammon
2 cups all-purpose flour
3 teaspoons baking powder
1 teaspoon salt
4 tablespoons butter, softened
1 cup skim milk

Let's prep the peaches first.  They can cool off in the ice bath while you prepare the topping for the cobbler.

Bring a large pot or deep skillet of water to a boil.  Score the bottom of each peach by making an "x" with a sharp knife.  Lower into the sauna and blanch for 3-4 minutes or until you see the peels starting to pull back from the fruit.  Remove the peaches and immediately place in an ice bath for 10 minutes.  (If you need to see detailed pictures, you can see my recipe for Rustic Peach Pie). 

While the peaches are cooling, combine the flour, baking powder, and salt in a medium bowl.  Set that aside for just a minute.

For the record, I have no idea how that butter snuck into the picture.  It was not supposed to be there yet, so I pulled it right back outta the bowl and told it to wait it's turn. 

Peel the cooled peaches (the skins should slide right off) and slice into a large skillet. 

Add the sugar, cornstarch, lemon juice, and cinammon.  Bring the mixture up to a gentle boil and cook until the peaches and the liquid thicken, about 2 minutes.  Remove from the heat. 

Go ahead, lick the spoon you were using to stir the peaches...it's good ya'll!

Pour the cooked peaches into a lightly greased 9x13 baking dish, and spread them out evenly. 

Now add the the butter to the dry ingredients and work it in with your fingers or a pastry cutter until the mixture resembles coarse crumbs.  Add the milk and stir together to form a sticky batter.

Drop the batter over the peaches using a large spoon.  You can leave it in dollops or spread it out (I like to spread it out). 

Sprinkle over 2 tablespoons sugar.  I used turbinado sugar, but regular granulated sugar is just fine. 

Bake at 375 degrees for 25-30 minutes or until the cobberl is bubbling around the edges.  Let stand for 15 minutes before serving. 

Serve warm in small bowls with a scoop of whipped topping or frozen yogurt. 

Only Rebecca, David and I ate this, but my girl LOVED it.  She probably had 2 servings every night, and I let her, 'cause it's a light dessert.  It wouldn't be right if David and I hogged it all anyway. ;-)

Enjoy this light treat, and God bless your table tonight!