Monday, December 19, 2011

Red Velvet Cream Cheese Brownies

David's office had a bake-off last Friday.  I had about one million things to do on my list...and I honestly wasn't going to enter at first.  But then, I heard the prize was a $50 gift card.  Well, I don't know any woman who doesn't like gift cards.  So...I changed my mind (I can, because again, I'm a girl, right? ;-), and hey, I'm a pretty competitive person when it comes to cooking/baking. 

The day before the bake-off, David's boss threw in an extra prize...2 field level tickets to the Texans playoff game on Sunday.  YEE HAW.  I am not a big Texans fan, but I really wanted to win.  David has been working non-stop...literally burning the midnight oil at the office these days.  So I wanted the tickets for him...I knew he would love a break!

I made the brownies, cut them out with a 2-inch biscuit cutter, and put them in pretty black and white cupcake liners.  Then I sent them to work with David Friday morning and held my breath.

The judging was going to be at 3:00 PM, and David called me around 4:00 to tell me the results.  I could tell right away by his voice that I didn't win.  Darn. 

But then, I heard him say, "Well, we won the tickets anyway." 

WHAT????

David explained that the person who won couldn't go to the game.  My brownies were in a 3-way tie for second place.  So they had a raffle amongst the three, 2nd place winners.  And lo and behold, David won the tickets. 

WOO HOO!!!

I stil think I should have won.  The winner brought peach cobbler.  Seriously?!  Must have been some dang good cobbler.  My hubby was really sweet, and told me of course, he voted for me, lol.  And in case you were wondering, the Texans lost yesterday...bummer.  There go the playoffs. :-(

(And I'm sorry, I was nervous, and in a hurry, and completely forgot to take pictures until the end).

So, I know you want to make these brownies.  They were surprisingly easy, even though they look very fancy.  I didn't even use a stand mixer or egg beater, just a wooden spoon, a bowl, and a toothpick.  Put them on a pretty plate, and watch them disappear. :-)

Red Velvet Cream Cheese Brownies

Red velvet layer:
1 stick unsalted butter, melted
1 cup sugar
1 teaspoon vanilla extract
1/4 cup unsweetened cocoa powder
pinch of salt
1 tablespoon red food coloring
1 teaspoon apple cider vinegar
2 large eggs
3/4 cup all purpose flour

Cream cheese layer:
8 ounces cream cheese at room temperature
1/4 cup sugar
1 egg
1/2 teaspoon vanilla extract

Preheat oven to 375 degrees.  Lightly spray/grease an 8x8 baking dish.  Set aside

In a medium bowl, combine the butter and sugar.  Once it's well incorporated, add the vanilla, cocoa powder, salt, red food coloring, and vinegar.  Stir again.  Add the eggs, one at a time, mixing well after each addtion.  Gently fold in the flour until just combined...do not overmix.  Reserve 1/4 cup of the batter.  Pour the remaining red batter into the prepared baking dish.

In another bowl, combine the cream cheese, sugar, egg, and vanilla.

If you're short on time, soften your cream cheese in the microwave on the "defrost" setting or the lowest power setting possible in 10 second intervals.

Carefully spread the cream cheese mixture over the red velvet layer.  Dollop the remaing brownie batter over the top, and swirl with a toothpick. 

Here's the secret to swirls.  Gently glide the toothpick back and forth over the batter, 6-8 passes across the pan.  Rotate the pan 90 degrees, then make another 6-8 passes.  Yes...it's that easy. ;-)

Bake the brownies for 30 minutes.  Cool completely before cutting. 

Here are the pictures I remembered to take!

 I spooned the extra red velvet batter in 4 even rows, so I could cut out the brownies with a 2-inch biscuit cutter, making the most of the swirled pattern.  And of course, I sample the scraps...we all did! :-)

I found these cupcake liners at Walmart...I really did, and they were only $1.50 for 50.  Aren't they pretty?

Or you can just put them out all by themselves. 

If you're looking for a last minute gift idea for a hostess, a friend, the neighbors, or heck...yourself, these brownies would be just the thing.  Quick, easy, pretty, and delicious!

I hope everyone has a very Merry Christmas, filled with family, food, and fun.  I'll see y'all after the new year!  God bless your table tonight!

Sunday, November 13, 2011

Hawaiian Style Short Ribs

I was skeptical when I first saw this recipe in November's issue of Everyday FoodI mean...short ribs?  In the crockpot?  REALLY???

But, I was curious enough to try it.  And man...I am SO glad I did.  I served this on a Sunday night about 2 weeks ago.  Theresa's godparents were at our house, and declared this "absolutely delicious."  They are famous for looking me up on Facebook to see what I'm making...then they'll call and ask if they can come over for dinner, LOL.  They even went so far as to say to please call them if I made this dish again, because they would love to help us eat it.  Imagine that!  Hilarious. 

Anyway...all my kids devoured this meal too.  I knew I would be making this again...very soon, and post it.   It was easy to make...most crock pot dishes are no brainers.  So here is a fabulous meal, fancy enough to serve to guests, yet casual enough to eat with your hands.  I mean...y'all eat ribs with your fingers, right? ;-)

Hawaiian Style Short Ribs
barely adapted from Everyday Food

4 pounds beef short ribs (I used 6 pounds for our larger family)
2 red onions, cut into 1-inch wedges (leaving the root ends intact)
6 cloves garlic, smashed
2-inch piece of fresh ginger, peeled and thinly sliced
1 1/2 cups light brown sugar (or 1 1/2 cups dark brown sugar)
2 tablespoons molasses*
1 cup low-sodium soy sauce
6 tablespoons rice vinegar
1 tablespoon Sriracha or favorite chili sauce
3 cups fresh, cubed pineapple
Cooked white rice for serving
Chopped green onions for serving

*I usually don't have dark brown sugar on hand, but you can substitute regular, white sugar plus 3 tablespoons molasses to make 1 1/2 cups of dark brown sugar, OR 1 1/2 cups light brown sugar plus 2 tablespoons of molasses).  I also didn't use Sriracha...because my kids have sensitive tongues, so I used 1 tablespoon sweet Thai chili sauce.  If you like a bit of spice, go for it!

In the bottom of your large crock pot/slow cooker, place the onion, garlic, and ginger.  (You will need a 5-6 quart slow-cooker). 

Put the short ribs on top, in one tight layer.  I had to put the last one in as a second layer because I ran out of room, but don't worry, they'll be fine. 

David and I had a date Friday night.  I wanted to go check out a new international food market downtown.  Phoenicia specializes in Middle Eastern and Mediterranean foods.  They had a new location, and I was hoping for free samples.  There were none but we bought a few items like capers, dried fruit, chocolate, and these awesome looking short ribs.  We ended up at Niko Niko's for dinner...which was fabulous and delicious.  Thanks for tolerating my commerical interruption!

Whisk together the brown sugar, molasses (if using), soy sauce, rice vinegar, and chili sauce.  Pour all over the ribs.

Cover the crock pot and cook on high for 4 hours  (or on low for 6 hours).  Add the cubed pineapple and continue to cook for another hour (or 2) or until the fruit is tender.  I probably used more than 3 cups, but you know me...I'm not much for measuring. ;-)

Alternatively, you can cook this on low for 8 hours, and add the pineapple the last 2 hours.
When you can't wait any longer, use a pair of tongs or a big spoon to remove the short ribs.  Do this gently, as they'll be tender little babies. ;-).  Then take a big, slotted spoon to remove the onions, pineapple, ginger and garlic. 

Use a ladle or degreasing cup to skim as much fat as possible from the cooking liquid. 

Serve the ribs over some rice, along with the pineapple and onions.  Drizzle some of the cooking liquid over the top...it's the best part, I'm telling ya!  Garnish with the green onions (it adds a nice, fresh flavor, and gives the dish some texture).

When I made this the first time, there was none left over.  At all.  Gracious...I was disappointed!  Oh well, I just won't post it on Facebook next time, ha ha. ;-)  This time, there was enough left over for another meal. 

This is the most incredible Sunday supper.  Easy as pie to make, and your house will smell divine.  Just throw it in the crock pot before church on Sunday, and come dinner time, everyone will be singing your praises!

God bless your table tonight!

Thursday, November 10, 2011

Greek Pizza

I was digging through the fridge yesterday, trying to see if I could use up a bunch of leftovers for dinner. I really couldn't come up with anything grand, but after seeing the container of artichoke hearts, I thought, "Hey, I can make a pizza!" However, I knew the kids wouldn't like a Greek-style pizza. They only like cheese or pepperoni. So a pizza with artichoke hearts, red onion, black olives, diced chicken, and tomatoes would send them running for the hills. They were perfectly happy with scrambled eggs and hash browns, except for my little foodie, Rebecca. She was actually jealous because she wanted pizza, but I wanted to save the rest of it for David (he is never home in time to eat with us). Luckily she LOVES hash browns, and eggs so that eased her mind. :-)

Sure enough, when David got home, he ate the rest of the pizza, half of it to be exact. I'd already eaten the other half. ;-)

Greek Style Pizza

1 refrigerated pizza dough, or 1 homemade pizza dough
4 tablespoons pizza sauce
1 cup mozzarella cheese
2 roma tomatoes, thinly sliced
1/3 cup red onion, thinly sliced
1/3 cup black/green olives, sliced
1/2 cup artichoke hearts, diced small
1 cup diced chicken
1/2 cup feta cheese, crumbled
2 teaspoons dried oregano

Preheat the oven to 375 degrees.

Spray a large baking sheet with non-stick cooking spray. Spread the pizza dough out to the edges. Bake for 5 minutes and set aside. You'll want to do this with a premade dough or homemade dough.


Once the dough has prebaked, spread the pizza sauce over the crust. Top with the mozzarella cheese and diced chicken.

Sprinkle over the cheese and chicken.

Next up...the tomatoes and red onion. Man...I'm getting hungry!

Then toss on the artichoke and black olives.

Lastly, scatter over the feta cheese and oregano.

In hindsight, I would have liked to drizzle over just a touch of olive oil. But I got distracted by a little baby tugging at my pant leg. She found me in the kitchen, where she proceeded to wail for her dinner. Bless her heart. :-) And heck, you can put the toppings on in any order you want...it really doesn't matter.

Put the pizza back in the oven and bake at 375 degrees for 12-14 minutes, or until the crust is golden brown. Let cool for 5 minutes before digging in.

I love the combination of salty and sweet. The olives and feta are tangy and briny, while the tomatoes and onions are sweet. I recommend not overloading the pizza with the feta and olives...otherwise, it will just be too salty.

Make this for the more appreciative members of your household...or make a cheese pizza on the side for the kiddos. Feel free to add green olives or fresh spinach...you should always make a pizza to your liking.

God bless your table tonight!

Wednesday, November 2, 2011

My Current Favorite Kitchen Tool

Theresa has been on solid food for several months now.  She LOVES to eat, and hasn't turned down a thing I've offered her.  In fact, I'll go so far as to brag that Theresa is my best eater yet (don't tell Rebecca! ;-).  We even put her in the tomato costume I made for Rebecca 9 years ago for Halloween. 

Isn't she PRECIOUS? 

Nowadays, I will throw random, frozen cubes of pureed food in a bowl for her, zap it in the microwave, and that's it..lunch or dinner is ready.  I've combined carrot with mango, strawberries with lentils, and peas with peaches.  Whatever I come up with, Theresa has eaten it all.  She's not crazy about solid food for breakfast, but admittedly, it may be because we don't have much time in the mornings.  I have to get the older girls ready and out the door by 7:30 to catch the bus, and then get Joshua and Gabriel off to school by 8:30.  There's not much time for a little one to eat, although I try to give her a few bites of toast or yogurt off of my plate.  She is pretty apt at picking up cheerios too, and other small bits of food, so that helps if I'm trying to get her dinner ready and she's hungry, but her portion is still in progress.

Lately, now that the weather has cooled off, I've made 2 batches of soup over the past 3 weeks.   I love to stir a big pot of comfort when it's nippy outside, plus I was hoping Theresa was ready for a puree with more texture and tiny chunks of veggies. 

So I made Broccoli Cheese Soup about 2 weeks ago, and last night I made Potato Chowder.  The broccoli cheese soup is already pureed, so I didn't have to process it further for Theresa.  She LOVED it.  I gave her a bowl for lunch/dinner for 3 days straight, and she inhaled it every time.  Who says babies don't like broccoli? :-)  The chowder can be left chunky, but the potatos and sausage were too chunky for my girl, so I broke out my immersion blender and blended the soup to a consistency that was better for Theresa.  Guess what, she loved it too!

I have to give my immersion blender a shout-out.  I've been using it several times a week to process whatever we're having for dinner so Theresa can eat it too.  It's perfect because doesn't take up as much room as a standing blender or food processor, it's easy to clean, and it doesn't make a big mess at all.  In fact, I pureed the potato chowder in the same container I used to store it in the fridge.  See?

Obviously the best reason to have an immersion blender handy is whenever you're making a soup that needs to be pureed.  Besides the Broccoli Cheese Soup and the Potato Chowder, I also use it for my Roasted Tomato Soup and Black Bean Soup.  Just stick it right in your soup pot, and blend away.  No pouring hot soup back and forth from a blender to the pot, and less dishes to wash at the end of the night.  I'm telling y'all...this handy tool could be your best friend, especially if you have a baby who loves soup. ;-)  And it works for other things too, like homemade salsa, whipped cream, and smoothies (although it doesn't like ice...too hard). 

Don't have one of these gadgets?  Christmas is right around the corner ladies.  Get it on your wish list...mine is about 6 years old, and isn't made anymore. 

But here's a whole slew of immersion blenders on amazon.com.  A decent quality one will only set you back about $50 (or less!).  Your husbands can thank me later for making their Christmas shopping so easy..lol!

I'm sorry I haven't posted a new recipe lately.  I'm been pretty busy, and up to my eyeballs in a 3,000 envelope mailout for my hubby's work.  Yes...3,000.  I have to have 1,500 done by the end of next week...I have 1,050 done so far.  So um...yeah...it's taking nearly every spare minute I have.  Someone remind me not to volunteer to do this mailout next year, okay?  Thanks!

I'll try to check back in sometime next week, and post something new and fun for y'all to make.  In the meantime, God bless your table tonight!

Wednesday, September 28, 2011

Easiest Ever Pulled Pork

Here's another crockpot recipe that is EASY.  I mean, really easy.  And there's only 3 ingredients.  I've made this 4 times since Theresa was born, because a big hunk of pork can feed us for a week.  This time, I divided the meal...half went to a friend who just had a baby, and half was for us. 

Of course, when I went to the store to get the pork butt, I asked the butcher for the biggest one.  He promptly wrapped up a 10 beast for me...wow! 

I didn't take as many pictures as I usually do.  I meant to start the pork right before I went to bed, forgot about it, and realized my oversight at midnight.  Yeah...midnight!  So there are no "before" pictures because I was yawning too hard to take pics at midnight.  I know y'all will forgive me. ;-)

Easiest Ever Pulled Pork

One Boston pork butt, about 6-8 pounds (bigger is fine too!)
BBQ spice blend
1 cup apple juice

The day before you want to cook the pork, remove it from the wrappings and trim off some of the fat.  It's really up to you how much you want to take off, but don't take off ALL of it.  You have to leave some on.  Fat = flavor, and you want some fat to flavor the meat while it's cooking.  There should be a large cap of fat on one side...I probably took off about 2/3rds of it. 

Take your favorite BBQ spice blend and rub it generously all over the meat.  Don't be shy, you want to use at least 4 tablespoons.  Honestly, I didn't even measure, I just sprinkled it on, all over, and made sure to rub it in really good.  I love, love, love Penzeys' BBQ 3000

Return the pork butt to the fridge and let it hang out for 12 hours or overnight. 

The next day (or that night, whatever floats your boat), set up your crockpot.  Pour in 1 cup of apple juice.  Lay the meat, fat side up in the slow cooker. 

Set your crock pot on "Low" for 8-10 hours.  And that's it...you don't even need to turn it over...I didn't. 

By the way, if you don't want to wake up to the smell of pork in the morning, don't do this the night before.  Rebecca told me she woke up in the middle of  the night, and could smell it all the way upstairs.  She didn't mind. ;-)  Some people prefer the smell of coffee...I can understand that!

After 10 hours, here's the finished product...I let mine go 10 hours because it was so big.

Doesn't that look DIVINE?  Porkalicious baby!

At this point you can leave it until dinnertime, or you can go ahead and remove the meat from the pot.  I use a really big cutting board and shredded it all up...it should be so tender, you barely have to touch it to break it up.

Oh, and don't forget to take out the big bone...nobody wants that. ;-)  The kids were impressed by the size of this one!

If I have time, I try to degrease the cooking juices with my degreaser cup.  I don't take off every drop of fat though...you gotta leave some it, because that's where most of the flavor is. 

We love to eat the shredded pork on little wheat rolls...I get 'em at Walmart.   Don't forget to pass around the BBQ sauce too.  I made some cucumber salad and baked beans on the side.  I've served the sandwiches with coleslaw too, (which is REALLY good if you put it in the sandwich) but nobody really cares for coleslaw in our house except me...hence the reason for the cucumber salad. 

This is always a sure thing meal at our house...everyone eats it.  Best of all, now that Theresa is eating some solid food, she can have the pork, baked beans, and a bit of the roll, no problem.  She is really a good feeder. :-)

I hope you can make this on a busy night and have an easy meal all ready to go for your family.  God bless your table tonight!  

Wednesday, September 21, 2011

Crockpot Ravioli

So now that school is back in session, we're all looking for quick, easy, meals to get on the table, right?  Well, look no further.  A good friend of mine emailed this recipe to me...and I knew I had to try it.  Best of all, I could use jarred pasta sauce and frozen ravioli...yeah!  Okay, I admit, I wasn't going to take the time to make my own pasta sauce, let alone homemade ravioli anyway.  

Here's the link to the original recipe, feel free to tweak it the way your family likes it.  As you'll see, I didn't have any red peppers, so I used a few, chopped sun-dried tomatoes.  I doubled the recipe, and had only one and a half jars of pasta sauce...it worked just fine.  I have an Italian seasoning spice blend, but I decided to use Penzey's Pasta Sprinkle, because I just love it.  I didn't' add the one cup of water...I find most crock-pot meals don't need a lot of added liquid.  And I sprinkled some freshly grated Pecorio-Romano cheese over the top of the finished dish...because you can never have enough cheese if you're serving kids. :-)

Crockpot Ravioli
adapted from Food.com

One bag (25 ounces) frozen beef or cheese ravioli
1 jar (24 ounces) prepared pasta sauce
1 (8 ounces) can tomato sauce
2-3 tablespoons chopped red pepper
Italian seasoning blend
1-2 cups shredded mozzarella cheese 

Pour half of the pasta sauce in the bottom of your crockpot.  (If you're doubling the recipe, you will definitely need a large, 5 quart slow-cooker). I used a tomato-basil marinara sauce.  

Arrange the ravioli over the sauce.  

Pour the rest of the pasta sauce over the top, and sprinkle with the spice blend...about 2 teaspoons. 

Add the tomato sauce, and sprinkle on a bit more spice blend ( wanted some herbal flavor in between the layers).  Top with the chopped peppers (I used sun-dried tomatoes).  

Sprinkle the cheese over everything and cover.  Cook on low for 4-5 hours, or until the ravioli is heated through. 


Here's what my pot looked like after 4.5 hours.  

Voila!  And I didn't have to do any cooking at all!  :-)


Garnish with a little freshly chopped basil and some grated parmesan cheese if desired.  

The pickiest eater in our house (Christina) LOVED this, and get this...she asked for seconds.  I'm telling you, that never, ever, happens, so I was thrilled!  

Enjoy, and God bless your table tonight!

Tuesday, September 6, 2011

Vietnamese Summer Rolls

It is hotter than blazes here.  So hot, that I am cooking in spurts.  I'll go a whole week without really having cooked anything worthwhile, and then I'll go crazy for a couple of days, making enchiladas, chicken spaghetti, and these summer rolls.  No, these are not rainy day makings either...we're way behind the rainfall we normally get in a year.  It's finally cooled down a little bit, but I made these a while back when it was just so hot, turning on the stove or oven was the last thing I wanted to do. 

In between praying for rain and cooking spurts, I've been trying to make things for David to take to work.  He started a new job a few weeks ago.  The headquarters for the company is way out in the middle of nowhere, about a 45 minute commute.  The good news is it's a nice, pretty drive down country roads.  The bad news is there are no restaurants of any kind for miles around.  It's not such a bad thing...I'm secretly happy I get to cook for him more often instead of him eating out nearly every day like he was previously.

I made these summer rolls years ago, and it was fun, but really too fussy for my level of patience at the time.  Fast forward about 8 years, 5 kids later, and throw in a fabulous garden...well, it's still fussy, but the kids can occupy themselves, someone is always around to hold the baby, and the herbs I need are conveniently right outside the back door.  Not so bad, right?  Plus, I don't have to heat up the house, and the 2 ingredients that do require the stovetop take mere minutes to cook.

I found everything I needed at my local grocery store.  Hopefully you can as well, and have something cool and refreshing to eat on a hot summer day. 

Vietnamese Summer Rolls

8 rice paper wrappers (look for them in the Asian section of your grocery store)
12 medium shrimp (unpeeled)
4 ounces rice vermicelli noodles (make sure you get rice, not wheat vermicelli)
1 cucumber, peeled, seeded, and julienned
3 scallions, julienned
1 carrot, peeled and julienned
1 teaspoon salt
Handful of fresh mint leaves
8 large (or 16 small/medium) fresh basil leaves
Handful of fresh cilantro
8 lettuce leaves (green leaf, Boston, or romaine works fine)

Poach the shrimp briefly in a pot of simmering water for 2-3 minutes...don't overcook them.  As soon as they are pink and opaque, drain and run under cool water.  Cut in half lengthwise, and set aside.

Cook the rice noodles according to the package directions.  It should only take 3-4 minutes.  Drain and set aside to cool.

Toss the cucumber and scallions with the salt to help them soften slightly, but still retain some crispness.  Set aside for a few minutes. 

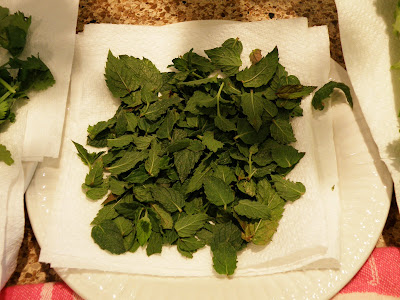
Have all the herbs washed, spun dry in a salad spinner (or patted dry with paper towels) and ready to go.  I was lucky to have some nice mint and basil from the garden.  Alas, my cilantro had already gone to seed. 
Leave the lettuce leaves whole if they are smaller, larger ones can be simply torn in half.  They should also be washed and dried.  

Soak a rice paper wrapper in water for about 20 seconds.  Lay out on a work surface covered with a clean kitchen towel.  The towel will absorb any excess water. 

Lay 3 shrimp halves across the middle of the wrapper.  Top with the noodles, cumcumber and onion mixture, carrots, cilantro, mint, and basil.  Place on lettuce leaf over everything.

Fold the bottom half of the wrapper carefully over the filling.  Don't worry...it feels delicate, but it's quite strong.  Fold in the sides, and then roll into a tight bundle. 

You can cut them in half on the diagonal to serve 'em if you want to be fancy. :-).  David doesn't go for looks when he's eating, he just opens his mouth, lol.  Serve with some peanut sauce on the side (you can find that in the Asian section of the store too). 

I doubled this recipe and made about 18 rolls (it just depends how much filling you put in).  They are best the day you make them, but will keep for one day in the fridge, in a lightly covered container, with a paper towel at the bottom to absorb any excess moisture and additional paper towels in between the layers. 

I'm not going to lie.  It took me a good part of the day to make these.  I prepped the vegetables, herbs, and shrimp in the morning, and cooked the noodles and assembled the rolls in the afternoon.  They may take some work, but it's worth it, trust me.  They are WAY better than anything store-bought.  You know you've always wanted to make these, right?  Don't be scared...you can do it!  Just remember I have to manhandle 4 kids and nurse a baby too. ;-)  It probably won't take as long for you. 

Stay cool everyone, and I hope you make these summer rolls while you're trying to beat the heat! 

 God bless your table tonight!