Saturday, August 29, 2009

White Pizza with Roasted Garlic and Shrimp

About 2 weeks ago, pizza dough was on sale, $1.25 each if you bought 5.  Plus an additional $3.00 off  if you bought 10.  Even though I don't mind making pizza dough from scratch...you really can't beat $1.25 for refridgerated dough.  So I've been scheming and dreaming of new pizza recipes.

Well...shrimp was on sale this past week too...16-20 count for $5.99/lb.  That means there's 16-20 shrimp per pound.  The higher the count, the smaller the shrimp; the smaller the count, the bigger the shrimp.  I don't like itty-bitty shrimp, so I really stock up when decent sized shrimp is on sale.  I only now have run out of the shrimp I bought up during Lent this past spring.  I think if you really want to eat well and healthy in a recession, you can...but you have to pay attention and buy pricer proteins (like seafood) when they're on special.  And using it on pizza (or with pasta) is a great way to make it stretch.

The kids love plain cheese pizza...I know...boring if you're an adult, right?  Rebecca's favorite toppings are Canadian bacon and pineapple...which is also my favorite combination.  David loves a real meaty pizza...sausage, ham, pepperoni, with red onions.  But I wanted to make a white pizza this time...which is usually made with either an alfredo-type sauce, or no sauce at all. 

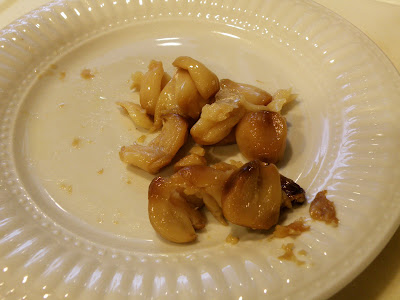
Roasting the garlic doesn't make the garlic flavor stronger...it actually makes it very mellow, buttery, almost caramel-like.  If you don't like the smell of roasted garlic in every room of your house...this is not the recipe for you.  But I'm telling you right now...you're missing out ;-). 

White Pizza with Shrimp and Roasted Garlic
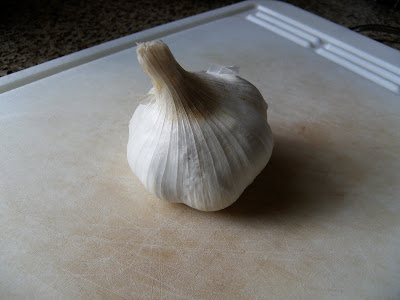
1 head garlic
2 teaspoons olive oil, divided
1 pound shrimp, peeled, deveined, rinsed, and patted dry
salt and black pepper
1 tube refridgerated pizza dough (I like Philsbury's thin crust)
2 tablespoons cornmeal
1/3 cup prepared alfredo sauce
1 1/2 cups mozzarella cheese
1/2 teaspoon italian seasoning blend


We're going to roast the garlic first.  This is the easiest thing in the world! 


Preheat the oven to 400 degrees.  Remove as much of the thin, papery skin, but don't peel the individual cloves, or pull them apart. 


Now use a small, sharp knife to cut off the tips off each clove.  Just turn the head on its side and cut off a bit of all the cloves in the middle.  There's a ring of cloves around the outside of the bulb, so you'll have to do those individually.  Place a small sheet of aluminum foil under the garlic.  Then pour 1 teaspoon of olive oil over the garlic, making sure to get a bit into each the clove. 


Now wrap up the garlic bulb and place it in the oven for 40-45 minutes or until the garlic is completely soft. 


Let the garlic cool while you cook the shrimp.


Heat the remaining 1 teaspoon of olive oil in a large, nonstick skillet.  Make sure the shrimp are very dry.  Any residual water will make the shrimp "stew" instead of getting a nice sear.  Season them with salt and pepper on both sides.


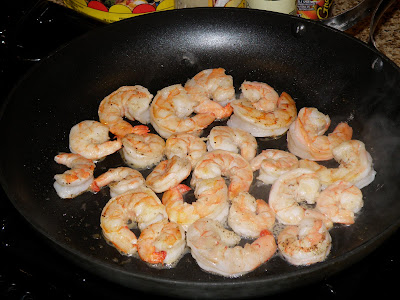
Now sear the shrimp for just 2 minutes on both sides.  We don't want to cook the shrimp completely...a tad under done is fine.  They'll finish cooking in the oven once we add them to our pizza.


Remove to a cutting board and let cool for just a minute.  Cut the shrimp into bite-sized pieces if they were on the larger side like mine.  I think pizza toppings should be small-ish so it's easier to eat. 


The garlic should be cool enough to handle now.  Use your fingers to gently squeeze out all the roasted garlic from the cloves.  Cutting each clove with a small knife may help, but I didn't bother.  Then mash the garlic with a fork...it's so soft, it's like buttah people! 


Preaheat the oven again to 400 degrees (or whatever your dough directions say).  Spray a baking sheet with non-stick cooking spray, and then sprinkle with the cornmeal.  Roll out the dough and press it to the edges, or as much as you can.  Spread with the roasted garlic, and then the alfredo sauce.   Sorry I didn't take a picture until this point...I was feeding the kids their pizza and making the ours (the grownups) at the same time.  The garlic will be a VERY thin layer, but you should have enough to cover the dough. 


Now sprinkle on the cheese...


then the shrimp...


And then the pasta sprinkle...now that I'm on Penzey's mailing list, (and a regular customer) we got a voucher in the mail for a FREE jar of this stuff...and it's awesome on homemade pizza.  An italian spice blend, some dried basil, or oregano would be fine too. 


Bake the pizza for 13-15 minutes or until the top is lightly golden brown and the crust is nice  and crispy on the edges. 


Let stand for a few minutes before serving.


This pizza was AWESOME.  The roasted garlic added a wonderful, creamy, mild flavor...you could tell it was garlic, but it was a deep, nutty, buttery taste.  After doing more research on the internet, I can't wait to use roasted garlic with pasta, bread,  homemade hummus, mashed potatoes, blended with cream cheese, soups, veggies...yum! 


Allrecipes.com always has good recipes, so click here if you want more ideas.  Let me know if you try any...I'll be trying some myself! 


God bless your table tonight!

Wednesday, August 26, 2009

More Cake Ball Lollipops

I've had so much fun making cake ball lollipops! I've made them 2x now...for a dessert social, and for Christina's birthday. So this week, I made them for a back-to-school luncheon. I realize I'm getting this post up after school has already started for most people. But if you're reading this...and your kids don't start school until after Labor Day, you're in luck!

I don't have the recipe here for you...but if you go to Bakerella's blog, she has the best recipes and ideas for cake ball lollipops. Plus her cake balls and pictures are WAY better than anything I could ever do.

So I made the cake balls in red, blue, and yellow, and sprinkled them with red, blue and yellow sugar sprinkles. I took them to the luncheon, and all the kids loved them (the grownups did too :-).

I've learned some tricks about making these...and I'm going to make a list of them if you decide to make them yourself.

1. You have to use oil-based food coloring if you decide to buy white candy melts and color them yourself. Any other kind of food coloring will ruin the melts. You can add 1 teaspoon of solid vegetable shortening if the coating seems to stiff/thick. I've found using 2 teaspoons to one bag of melts works pretty well.

2. Be careful not to overheat the candy melts. I melt mine in a double boiler on the stove. There is more risk to overheat them if you use the microwave, so I don't recommend that method.

3. When you're ready to coat the cake balls, dip the end of the lollipop stick in the melts, about 1 inch. Then stick it into the cake ball. This will help the cake ball stay on, and cover the ball around the stick, which sometimes doesn't get enough coverage when you dip the balls in the candy melts.

4. Use a large, deep coffee mug for the melted candy coating. Dip the cake ball in, submerge it completely, and then pull it straight back out. Rotate the ball gently to smooth out any excess, sprinkle it with the sugar crystals (if desired) and stand it straight up into a block of styrofoam to finish drying.

5. The cake balls can stand at room temperature. Don't put them in the fridge; the candy coating will sweat, and then it'll fall off. But be prepared...they're addictive, and I'll bet they won't last very long! I took 47 of these to the luncheon, and only came home with 3! Good thing I kept back 6 at home...or my kids would have started a riot.
6. I've found the easiest way to transport these is to put them in a small, short vase. Or keep them in the styrofoam block, and put that into a basket. I used shredded paper (for gift baskets) to cover the styrofoam. David build a very low platform which I put in the basket under the styrofoam, so the cake ball lollipops wouldn't be displayed too low.


Have fun...I can't wait to make more of these. The possibilities are endless...birthday parties, baby showers, dessert parties, bridal showers...you don't really need a reason!
God bless your table tonight!

Thursday, August 13, 2009

Julia Child's Coq Au Vin

I haven't delved much into French cooking. But I am so ready to go see Julie and Julia on Sunday, that I decided to start celebrating early and making a quintessential French dish.

Voila...Coq Au Vin.

I researched several recipes on the internet before I decided to try Deb's recipe on Smitten Kitchen. She stuck to Julia Child's original recipe the best. Some people used skinless chicken and turkey bacon...which could be done, but really shouldn't. Real bacon and skin-on chicken provide the flavor base...so substituting other ingredients will not guarantee the best results.

I'll say this up front about coq au vin. It took me just under 3 hours to make this. None of it was hard, really, all the steps are manageable (and I've never made coq au vin before). And granted I had 4 kids to wrangle at the same time. But this dish does require certain techniques...which are time consuming...making the sauce and skimming off the fat, browning the onions and then boiling them...and sauteing the mushrooms.


But...all the effort was worth it. This is definitely one of the best (for sure, one of the top three) chicken dishes I've ever made. It would be fantastic on a cold winter night. And make sure you drink the rest of the bottle of wine with it. If you're in the mood for a comforting chicken meal...this is it.

I've let Deb explain things...but I inserted the pics I took while cooking.

Julia Child's Coq Au Vin

Explained much better than me by Deb of Smitten Kitchen, and Julia Child's

Mastering the Art of French Cooking

Coq Au Vin [Chicken in Red Wine with Onions, Mushrooms and Bacon]

Feeds 4 to 6 people

A 3- to 4-ounce chunk of bacon
A heavy, 10-inch, fireproof casserole
2 tablespoons butter
2 1/2 to 3 pounds cut-up frying chicken
1/2 teaspoon salt
1/8 teaspoon pepper
1/4 cup cognac
3 cups young, full-bodied red wine such as Burgundy, Beaujolais, Cotes du Rhone or Chianti
1 to 2 cups brown chicken stock, brown stock or canned beef bouillon
1/2 tablespoon tomato paste
2 cloves mashed garlic
1/4 teaspoon thyme
1 bay leaf
12 to 24 brown-braised onions (recipe follows)
1/2 pound sautéed mushrooms (recipe follows)
Salt and pepper
3 tablespoons flour
2 tablespoons softened butter
Sprigs of fresh parsley

1. Remove the rind of and cut the bacon into lardons (rectangles 1/4-inch across and 1 inch long). Simmer for 10 minutes in 2 quarts of water. Rinse in cold water. Dry. [Deb note: As noted, I'd totally skip this step next time.]

Regular presliced bacon, btw, is perfectly fine! And I skipped the boiling step too.

2. Sauté the bacon slowly in hot butter until it is very lightly browned. Remove to a side dish.

3. Dry the chicken thoroughly. Brown it in the hot fat in the casserole.

4. Season the chicken. Return the bacon to the casserole with the chicken. Cover and cook slowly for 10 minutes, turning the chicken once.

5. Uncover, and pour in the cognac. Averting your face, ignite the cognac with a lighted match. Shake the casserole back and forth for several seconds until the flames subside.

I let the kids watch while I ingnited the cognac...they thought it was cool ;-). It does flame up for a good 2 minutes, so be sure to keep the little ones at a safe distance.

6. Pour the wine into the casserole. Add just enough stock or bouillon to cover the chicken. Stir in the tomato paste, garlic and herbs. Bring to the simmer. Cover and simmer slowly for 25 to 30 minutes, or until the chicken is tender and its juices run a clear yellow when the meat is pricked with a fork. Remove the chicken to a side dish.

I didn't have the chicken covered in liquid, but it turned out fine, I just turned it over once while it was cooking. I used a chianti imported from Italy, only $8.00. Yes, I sampled it first!

7. While the chicken is cooking, prepare the onions and mushrooms (recipe follows).

8. Simmer the chicken cooking liquid in the casserole for a minute or two, skimming off the fat. Then raise the heat and boil rapidly, reducing the liquid to about 2 1/4 cups. Correct seasoning. Remove from heat and discard bay leaf.

I used my gravy separator cup to remove the fat from the sauce. I had to use a slotted spoon to get the pieces of bacon, but the end result was a pan sauce with virtually no fat in it.

9. Blend the butter and flour together into a smooth paste (buerre manie). Beat the paste into the hot liquid with a wire whip. Bring to the simmer, stirring, and simmer for a minute or two. The sauce should be thick enough to coat a spoon lightly.

Make sure to combine the flour and butter thoroughly before adding it to the pan sauce.


10. Arrange the chicken in the casserole, place the mushrooms and onions around it and baste with the sauce. If this dish is not to be served immediately, film the top of the sauce with stock or dot with small pieces of butter. Set aside uncovered. It can now wait indefinitely.

Once I tasted the finished sauce, I thought it was a bit too salty, so I drizzled in 1/2 tablespoon of honey, and it was perfect. Next time, I will cut back on the salt.

11. Shortly before serving, bring to the simmer, basting the chicken with the sauce. Cover and simmer slowly for 4 to 5 minutes, until the chicken is hot enough.

If you make this in advance, reheat the dish over low heat (low power in the microwave). You don't want to overcook the chicken at this point; just warm it through.

12. Serve from the casserole, or arrange on a hot platter. Decorate with spring for parsley.

Oignons Glacés a Brun [Brown-braised Onions]

For 18 to 24 peeled white onions about 1 inch in diameter:
1 1/2 tablespoons butter
1 1/2 tablespoons oil
A 9- to 10-inch enameled skillet
1/2 cup of brown stock, canned beef bouillon, dry white wine, red wine or water
Salt and pepper to taste
A medium herb bouquet: 3 parsley springs, 1/2 bay leaf, and 1/4 teaspoon thyme tied in cheesecloth

When the butter and oil are bubbling the skillet, add the onions and saute over moderate heat for about 10 minutes, rolling the onions about so they will brown as evenly as possible. Be careful not to break their skins. You cannot expect to brown them uniformly.


Pour in the liquid, season to taste, and add the herb bouquet. Cover and simmer slowly for 40 to 50 minutes until the onions are perfectly tender but retain their shape, and the liquid has evaporated. Remove the herb bouquet. Serve them as they are.

I used the last of the onions from the garden, so some of them are on the large side. Make sure you leave the root end intact, so the onions stay together during the cooking process. If you don't have cheesecloth, just add the herbs whole and remove them later...won't hurt a bit :-).

Champignons Sautés Au Buerre [Sautéed Mushrooms]


A 10-inch enameled skillet
2 tablespoons butter
1 tablespoon oil
1/2 pound fresh mushrooms, washed, well dried, left whole if small, sliced or quartered if large
1 to 2 tablespoons minced shallots or green onions (optional)
Salt and pepper

Place the skillet over high heat with the butter and oil. As soon as you see the butter foam has begun to subside, indicating that it is hot enough, add the mushrooms. Toss and shake the pan for 4 to 5 minutes. During their sauté the mushrooms will at first absorb the fat. In 2 to 3 minutes the fat will reappear on their surface, and the mushrooms will begin to brown. As soon as they have browned lightly, remove from heat.

Toss the shallots or green onions with the mushrooms. Sauté over moderate heat for 2 minutes.

Sautéed mushrooms may be cooked in advance, set aside, then reheated when needed. Season to taste just before serving.

My best eater Rebecca had sworn off mushrooms, but I got her to try one of them tonight...she LOVED it! She promptly told Joshua, "Hey Josh, guess what? I LIKE mushrooms now!"

Traditionally, coq au vin is served with buttered noodles and peas, so I made some and served them with the chicken. Just peas with a pat of butter, salt and pepper, and egg noodles tossed with a pat of butter, and a sprinkling of parsley for color.

In case you're wondering, an entire stick of butter was used for this meal :-).

Man...this was really good. The chicken was so tender, and the flavor from the onions and mushrooms...heavenly! It was even better with the rest of the chianti I used to simmer the chicken...and I sure needed that glass of wine after being in the kitchen all afternoon!

I loved making this...even though my kitchen was a mess afterwards, and I was stressed because the kids were getting hungry. We ate at our normal time, but I think it's because they smelled it all afternoon. Next time, I will make the onions and mushrooms in advance (they can be made the day before), so all I'd have to do is make the chicken come dinner time.

Thank you Julia Child, and Deb, for an awesome recipe!

God Bless your table tonight!

Monday, August 10, 2009

Messed Up Meatloaf

What? Are you thinking I've lost it? Well, don't worry, I haven't. Although my brain is at risk for overheating...literally. It's been over 95 degrees for nearly 8 weeks in a row now...with a heat index of over 100. Should I try to fry an egg on the sidewalk? What do y'all think? Oh, and at this very moment, the wind is blowing and there's thunder in the air...but you know what? It's all a scam...I'll bet you $100 right now this storm system will pass right over without giving up a single drop of rain! (And sure enough, while I was working on this post, the sun came out, there was no rain, and it's now 99 degrees instead of 100. Whoo hoo!)

Instead of experimenting outside....let's get going INSIDE my lovely air-conditioned kitchen and throw some meatloaf together. This recipe is about 5 years in in the making...I've made it dozens of times now, and I really think I've tweaked it to death. The best part about this meatloaf is the secret ingredient...and yes, your kids and hubby will never know.

I like to use one pound of ground sirloin and one pound of ground pork. The pork adds great flavor...and you don't end up with just a loaf of beef. And if you know me well enough by now, there's lots of fresh thyme, involved too. Lastly, I put bacon on top, because it browns up so well in the oven. I get complaints if I leave it off!

Messed Up Meatloaf

1 pound ground sirloin
1 pound ground pork
1/2 cup pureed carrots (don't worry, I'll show you :-)
1 medium onion, chopped
1 teaspoon olive oil
1 medium green bell pepper, chopped
1 can mild Rotel, well drained
4 tablespoons barbecue sauce (I used a honey mesquite)
2 teaspoons chopped fresh thyme
2 tablespoons chopped fresh parsley
1/2 cup plain dry bread crumbs
1 teaspoon salt
1/2 teaspoon pepper
1 egg
4 slices bacon

First things first...we're going to steam the carrots. Use your vegetable steamer and steam one small package of baby carrots until tender, 14-16 minutes. Save the cooking liquid at the bottom of the steamer. If you don't have a veggie steamer, you can steam the carrots in the microwave or in a medium pot over the stove.

Take the cooked carrots and dump 'em into a blender/food processor and puree the carrots to a smooth consistency. Use about 1/4 cup of the cooking liquid if necessary, but you don't want carrot soup here, so use it sparingly.

And if you want to skip this step entirely, just buy 2 jars of pureed carrots in the baby food aisle. I had a bag of carrots in the fridge that needed to be used up.

In a medium skillet, saute the onions until nice and soft, 10-12 minutes.

I find putting raw onions in the meatloaf means the kids will see them later on, resulting in more complaints at dinnertime. Cooking the onions first assures they'll be milder tasting in the finished meatloaf.

In a large bowl, combine all the ingredients except the bacon. Use your hands to mix everything together, but be gentle...otherwise the meatloaf will be too dense.

Darn, I forgot the barbecue sauce!

Now, line a loaf pan with plastic wrap and pack the meat mixture gently, but firmly into the pan.

Have a sheet pan ready; invert the loaf pan onto the sheet, then remove the plastic wrap.

Place the bacon strips lengthwise over the meatloaf.

I like to bake the meatloaf on a sheet pan for 2 reasons. 1) You can wrap the bacon around 3 sides instead of just putting it on the top, and 2) The meatloaf cooks more evenly since 3 sides are exposed to the oven heat.

Bake at 350 degrees for 1 hour, or until the internal temperature is 165. If you haven't got a meat thermometer...I've been telling you to go get one right? Trust me...you'll love it...it'll be one of your favorite kitchen tools. Most of the fat will cook out, and make a mess on the sheet pan, but it'll clean up easy...don't worry!

Let the meatloaf rest for 15 minutes before slicing. Serve with ketchup, barbecue sauce, or condiment of choice. I made roasted green beans and cheesy mashed potatoes on the side, even though only Rebecca and I eat the potatoes. I personally think it's a crime to have meatloaf without mashed potatoes.

This makes enough to feed us for 2 nights. I guess when the kids are teenagers, I'll be making 2 meatloaves...or more!

God bless your table tonight!