 I am sorry it's taken me so long to post this. Easter came, the week afterwards was really hectic, my in-laws came into town, and whew...I've just been TIRED.
This recipe makes the best rolls ever. I found the recipe on the Internet some years ago, and they are a cinch to make. Even if you've never made bread before, you cannot mess these babies up...seriously...unless you are from another planet, and therefore...not human. It does take time...the dough needs to rise 3 times, but these bake up soft, light, and are perfect with roast chicken, split open for mini-sandwiches, or with a hot bowl of soup.
I have tried this recipe with both all-purpose and bread flour (which can be found in the baking aisle right beside the other flours). Either one works fine; I used bread flour because I had it on hand.
You can also make 2 loaves of bread or 16 sandwich-sized buns instead of 24 rolls as I did. The dough is very versatile--so make whatever you'd like :-). I was in a hurry, really wasn't paying attention, and ended up making 30 rolls instead of 24 (oh well!..that's what having 4 kids does to you I guess!)
Light Wheat Rolls
2 packages (o.25 ounces each) active dry yeast
1 3/4 cup warm water
1/2 cup white sugar
1 teaspoon salt
1/4 cup unsalted butter, melted and cooled
1 egg, lightly beaten
2 1/4 cups whole wheat flour
2 1/2 cups all-purpose flour
Additional 1/4 melted butter for the bread and greasing the pans
In a small bowl, combine the warm water and yeast. Let stand for 5-10 minutes or until the yeast is foamy and there are bubbles on the top. If you your yeast doesn't look like this:

then either your yeast was too old, your water was too hot, or both. You'll have to dump it out and start over again. But it's okay...just relax!
Now, in the bowl of a stand mixer, combine the yeast mixture, sugar, salt, butter, egg, and whole wheat flour. Let it go for a couple of minutes on low speed. You don't want to beat this to death...otherwise you'll develop too much gluten from the flour and your bread will be tough.

 Add the all-purpose flour, a 1/4 cup at a time, until the dough pulls away from the side of the bowl. You may need an additional 1/4 of flour, but don't add more, even if the dough feels sticky. Too much flour will make your bread heavy...and that's no fun.


Turn the dough out into a lightly greased bowl (non-stick cooking spray works fine)...
 cover with a clean kitchen/tea towel, and let rise until double in volume, about 1 hour. This is what it will look like after 1/2 an hour.
 Here's a trick to getting your dough to rise on a really cold day (like it was today). Turn on your oven and let it preheat for ONE MINUTE. It doesn't matter what temperature you set it at, but only leave it on for ONE MINUTE. Then turn it off, put your dough in, and shut the oven door quickly so the heat doesn't escape.
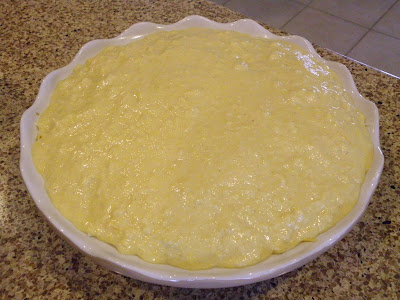
 This gives your dough a nice, barely warm place to rise. Here's what the dough looks like after one hour...it should be doubled size, and very fluffy looking.

Punch the dough down...
 cover it, and let it rise again for about 1/2 an hour. It should look like it did after the first rising.
After 1/2 an hour, punch the dough down again, and turn it out on a lightly floured surface. Let rest for about 5 minutes.

While the dough is resting, grease 2 dozen muffin cups (that's 24 for all you non-math majors like me) with the melted butter. Yes, you could use cooking spray or margarine, but why? Butter is better people, okay, trust me. And don't tell me your not going to split these open later and slather them with butter anyway. So why not start now?
Divide the dough into 2 equal portions. Divide each piece again, and then divide the quarters into 6 equal pieces. Got that? We're dividing the dough into 24 pieces. You can use a little bit of flour on your hands if you need to keep them from sticking to the dough. I'm sorry I couldn't take pics of the process, my hands were covered in flour :-).
Take each piece and gently pull the edges together. The underside will look like this...
 and the top will be nice and smooth, like this...

Place into the grease muffin cups.
 Continue with the rest of the dough until you have all 24 muffin cups filled.
 Cover and let rise one last time for about 45 minutes, or until doubled in volume.
Brush each of the dough balls with some melted butter. Do this very gently so you don't deflate your dough.

Bake at 400 degrees for 12-15 minutes or until golden brown on top.
 You should have just enough melted butter left to brush each roll one more time. I know...I know...but it's SO GOOD!
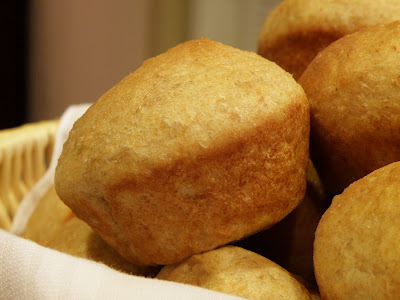
Pile the rolls into a basket and serve warm.
 Everyone in our house LOVES these rolls...when I served them with the Tortellini Soup, Gabriel had one bowl of soup and 3 rolls, lol!
I hope you try these out...once you do, you'll see it's not so hard to make your own bread. And BTW, these can be frozen and reheated in the oven or microwave, and they'll taste like they were just-baked.
God bless your table tonight!

 I came down with bronchitis earlier this week. I'm on the mend, but it's been a slow process...I never though a bad cough would become so exhausting! But I wanted to share this one post with you...and hopefully I'll be up for more serious cooking by the weekend.


 Pile the tuna salad on one slice of bread, add the lettuce (I used some from the garden), top with the other slice of bread, and consume with relish (like I did!).


 Pile the tuna salad on one slice of bread, add the lettuce (I used some from the garden), top with the other slice of bread, and consume with relish (like I did!).


 Season to taste with salt and pepper. When beef is no longer pink, drain off the fat. When I use ground chuck, I like to drain the meat in a colander lined with a thick layer of paper towels.

 Remove the pan from the heat and set aside. Lightly spray a deep dish pie plate, cast iron skillet or other oven proof casserole pan with some non-stick cooking spray.
  Pour the meat filling into the pan and smooth the top.
 Sprinkle the cheese over the meat. (Alternatively, you can stir the cheese into the meat mixture instead of putting it on top.)


 And here's the cake ball lollipops...
 Believe it or not, I actually have a brown dress and heels that complimented my new apron perfectly (not that I'm actually going to cook in this get-up, but I feel pretty!). Now...where's that string of pearls?


