
But I do have pictures of the finished product, and the frosting process too. See...I haven't lost it completely...not yet anyway :-).
I found this recipe on About.com, when I was fed up with my then sugar cookie recipe. The cookies were too delicate, and they broke so easily. I was determined to figure out how to make cookies that tasted great, but held up better, especially since I wanted my kiddos to help frost them.
Put on your prettiest apron, and let's bake! I have to show off my new Christmas apron, courtesy of my fabulous MIL. She bought the apron, and embroidered this design on it for me. Isn't it lovely? Thanks Mom!
 The BEST Sugar Cookies
1/3 cup butter flavored Crisco (vegetable shortening)
2 large eggs
2 tablespoons milk
1 teaspoon vanilla extract
3 1/4 cups all purpose flour
2 1/2 teaspoons baking powder
1/2 teaspoon salt
In a stand mixer bowl, cream the sugar, butter, and butter flavored Crisco together until creamy. I forgot to take my butter out of the freezer, so I put it outside on the fence to try and speed up the thawing process (after all, it was 78 degrees that day!). I ended up defrosting it a bit in the microwave, and then beating it for a minute in the mixer before adding the sugar.

 Add the eggs, extract, and milk. In a medium bowl, whisk the flour, baking powder, and salt together. Add this to the mixer in about 3 increments, so you don't have flour flying everywhere. Turn the dough out onto a couple of pieces of plastic wrap. Push the dough together into a flat disk, and refrigerate for about 3 hours. I like to make this first thing in the morning, and then bake the cookies that afternoon or the next day.
 When you're ready to bake, remove the dough from the fridge, and divide it into fourths. I think this is the best portion size to roll out easily.
 Sprinkle some flour out on your work surface, and dust some more on top of the dough. Try not to use too much flour...it will make the cookies tough if they pick up too much flour while you're rolling and stamping them out.
I should tell you...before I roll out cookie dough, I wash my countertops with hot water and soap, and then use a clean kitchen towel to dry it off. You don't want to use anything else, because your cookies might pick up some of the residue...and that wouldn't be a good thing.
 Roll out the dough to about 1/4 of an inch thick. I probably roll mine about 1/8 of an inch. Just experiment to see what works best for you. Turn the dough a couple of times while you roll it out, just to make sure it's not sticking.
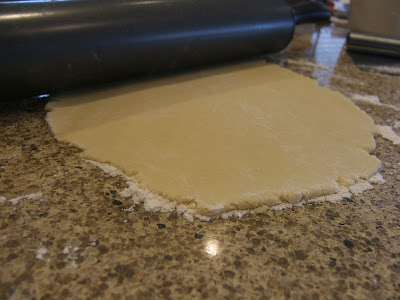 Stamp out your cookies, and transfer them to your cookie sheets. I much prefer to use non-stick cookie sheets; greasing baking sheets between batches would be a major pain. I have an assortment of cookie cutters, which were picked by the kids.

 If your dough seem too soft to work with, stick it in the freezer for about 10-15 minutes, and then try again. It was so warm and humid the day I made these, and my dough was pretty soft, but a quick trip to the freezer saved the day. I put the dough in the freezer in between batches as well, and it worked great.
Bake the cookies at 375 for 7-8 minutes, or until light golden. Watch the cookies carefully; I've made these for years now, and I've learned that 370 degrees is just right, the first batch needs 8 minutes, and the rest need only 7 minutes. I baked 2 sheets at once, and rotated them from left to right and front to back halfway through the baking time. So...these are not cookies you want to leave. I usually bake them during nap time--chances are, I'll have fewer interruptions.

 Transfer the cookies to a rack to finish cooling. I stacked these up after they cooled completely.
 Frost the cookies any way you'd like. If you want a great frosting recipe, check out my Molasses Cookies, which I frosting similar to these, only I colored the frosting. I usually leave my Christmas cookies white, and sprinkle them with colored sugar. Rebecca did all the angels this year...didn't she do a good job?
 I had to try a close up with my NEW camera!
If the kiddos help you out like mine did, be prepared to sweep the kitchen floor, because the sprinkles go EVERYWHERE!
God bless your table tonight!


No comments:
Post a Comment